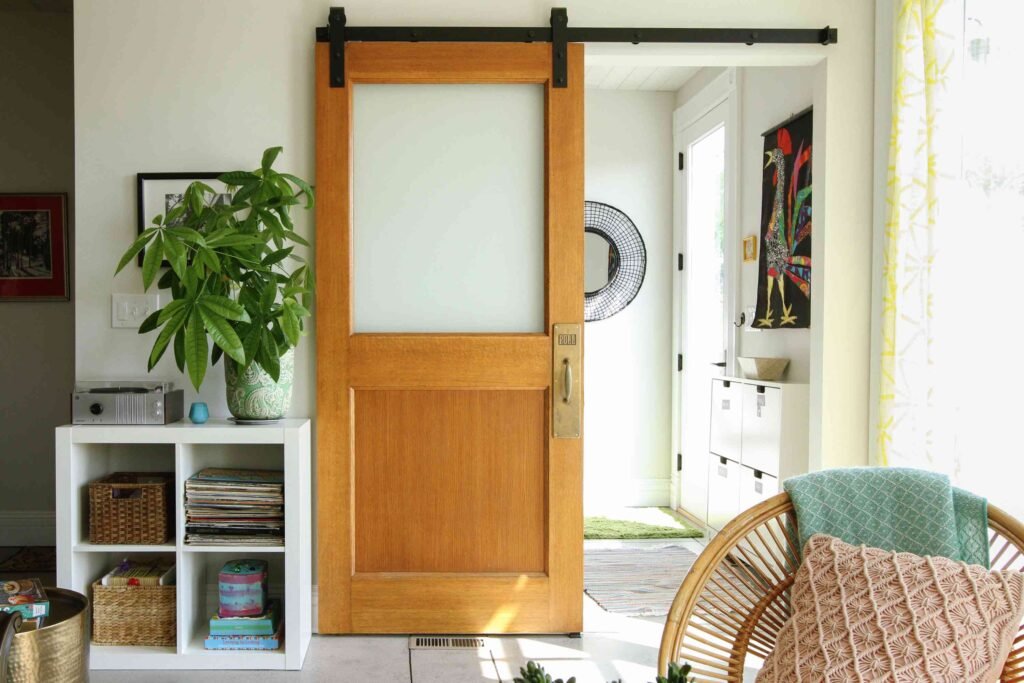
Barn doors are no longer just for barns. They’ve become a stylish, functional addition to modern homes, adding charm while saving precious space. Whether you’re a DIY enthusiast or an interior designer, properly preparing your space for a barn door kit is key to a hassle-free installation. Don’t worry—it’s not as daunting as it sounds! Here’s a step-by-step guide to get it right.
Why Choose a Barn Door?
Before we grab our measuring tapes, let’s quickly address why barn doors are such a great idea in the first place.
- Space-saving design: Sliding barn doors don’t swing open, making them ideal for tight spaces or rooms where layout flexibility is important.
- Style upgrade: From rustic farmhouse to sleek contemporary, there’s a barn door kit that matches your aesthetic.
- Easy DIY installation: With the right prep, you don’t need a professional for installation.
Convinced? Great! Now, let’s prep your space to make that barn door dream a reality.
Step 1: Gather Your Tools and Materials
Before you start, make sure you have the basics ready:
- Measuring tape (preferably a sturdy one that doesn’t flop mid-measure)
- Pencil
- Level
- Stud finder
- Ladder or step stool
- Notebook (or a note-taking app if you prefer the digital route)
Having these on hand will make measuring and prepping your space smoother. Now, get excited—it’s measuring time!
Step 2: Measure Your Doorway
The first (and possibly the most important) step is accurately measuring your doorway. Precise measurements ensure that the barn door kit you purchase fits beautifully. Here’s how to do it:
Measure the Width
- Use your measuring tape to measure the width of the doorway.
- Measure at the top, middle, and bottom of the frame to ensure consistency. Sometimes, walls can surprise you with slight variations.
Measure the Height
- Next, measure the height from the floor to the top of the doorway. Again, take measurements at multiple points along the width to confirm consistency.
Add Buffer Space
- Your barn door should ideally be 2 inches wider and 1 inch taller than the doorway opening. This ensures full coverage when the door is closed.
For example:
Doorway Width = 36 inches → Your Barn Door Width = 38 inches
Doorway Height = 80 inches → Your Barn Door Height = 81 inches
Pro Tip: Write down your measurements immediately—brain cells love to forget numbers at the worst possible moment.
Step 3: Check for Wall Clearance
Barn doors slide along a track, so you’ll need enough wall space for the door to move freely. This is where many people realize they didn’t choose the right wall. Avoid that mistake by following these steps:
- Measure the distance to the nearest corner, switch, or obstruction on the wall adjacent to the doorway.
- The wall space should be at least as wide as the door itself. If your barn door is 38 inches wide, you’ll need at least 38 inches of unobstructed wall space.
Watch out for things like light switches, power outlets, or art frames that could get in the way. If you spot any, consider relocating them before installation.
Step 4: Locate the Studs
Time to talk about those unsung heroes in your walls—the studs. Your barn door track will need to be securely mounted to studs, as drywall alone isn’t strong enough to support most barn door kits.
- Use a stud finder to locate and mark the position of the studs above your doorway.
- Typically, studs are spaced 16 or 24 inches apart. Aim for at least two studs along the length of the track for added stability.
Pro Tip: If your studs don’t align with the track, you’ll need to add a backer board. Not as scary as it sounds, I promise!
Step 5: Choose the Right Barn Door Kit
Now comes the fun part—choosing your barn door kit. There’s a world of options out there, so pick one that matches both your measurements and the vibe of your room.
Things to Consider:
- Material: Solid wood, metal, or even glass options are available.
- Style: Rustic, modern, industrial—there’s something for everyone.
- Weight: Heavier doors will require more robust tracks and hardware.
Many barn door kits come with everything you need, including the sliding track, door pulls, and mounting hardware. Double-check the package contents before committing.
Step 6: Prep Your Space for Installation
With your measurements taken and your barn door kit in hand, it’s time to prep your space for the actual installation. Here’s how:
- Clear the area: Remove any furniture or wall decor adjacent to the doorway and wall space.
- Mark your track placement: Using your level, draw a straight line above the doorway to mark where the barn door track will be installed. It should be at least 1 inch above the door height.
- Add the backer board (if needed): If your studs don’t line up, install a backer board first. You can paint or stain it to match your wall for a cohesive look.
Prepping might take a little time, but trust me—it saves a world of frustration during the actual installation.
The Finish Line
Once your space is measured, cleared, and prepped, you’re ready to install your barn door kit. Most kits come with a detailed instruction manual to guide you through. Take your time and enjoy the process—it’s satisfying to see your effort pay off with a stunning new feature in your home.
And if you’re not super confident about installing it yourself? Don’t stress. Calling in a professional is always an option.
Closing Tips and Resources
Congratulations—you’re one step closer to transforming your space with a beautiful barn door. Here’s a quick recap to ensure everything’s on track:
- Measure twice, buy once.
- Choose a barn door kit that fits your style and needs.
- Don’t skip the prep—it’s the key to a smooth installation.